Installation and Setup of ReadStore (Tutorial Part 1)
Install and Run ReadStore Basic
If you work with next-generation sequencing (NGS) datasets, you know how important it is to have a reliable system to store, organize, and access your data efficiently. ReadStore Basic is an open-source solution designed to help researchers and labs manage NGS data.
This tutorial walks you through installing and running ReadStore Basic and connecting it to the web application.
1. Install and Start the ReadStore Server
The ReadStore server is responsible for storing and managing your sequencing data, while the web interface allows you to access it through your browser.
Prerequisites
- Python 3.12 or higher
Step-by-Step Installation
1. (Optional) Create a virtual environment
python3 -m venv venv
source venv/bin/activate
2. Install ReadStore Basic
pip install readstore-basic
3. Verify installation
readstore-server -v
4. Start the server
readstore-server
- By default, required directories are created automatically.
- The server will start locally.
2. Access the ReadStore Web Application
Once the server is running, open your browser and navigate to:
http://127.0.0.1:8501
Accessing a Remote Server via SSH Tunnel (Linux)
If your server runs on a remote machine, you can create an SSH tunnel:
ssh -i path/to/sshkey.pem -L 8501:127.0.0.1:8501 username@host
Then open the same URL in your local browser:
http://127.0.0.1:8501
- On Windows, tools like PuTTY can be used for SSH tunneling.

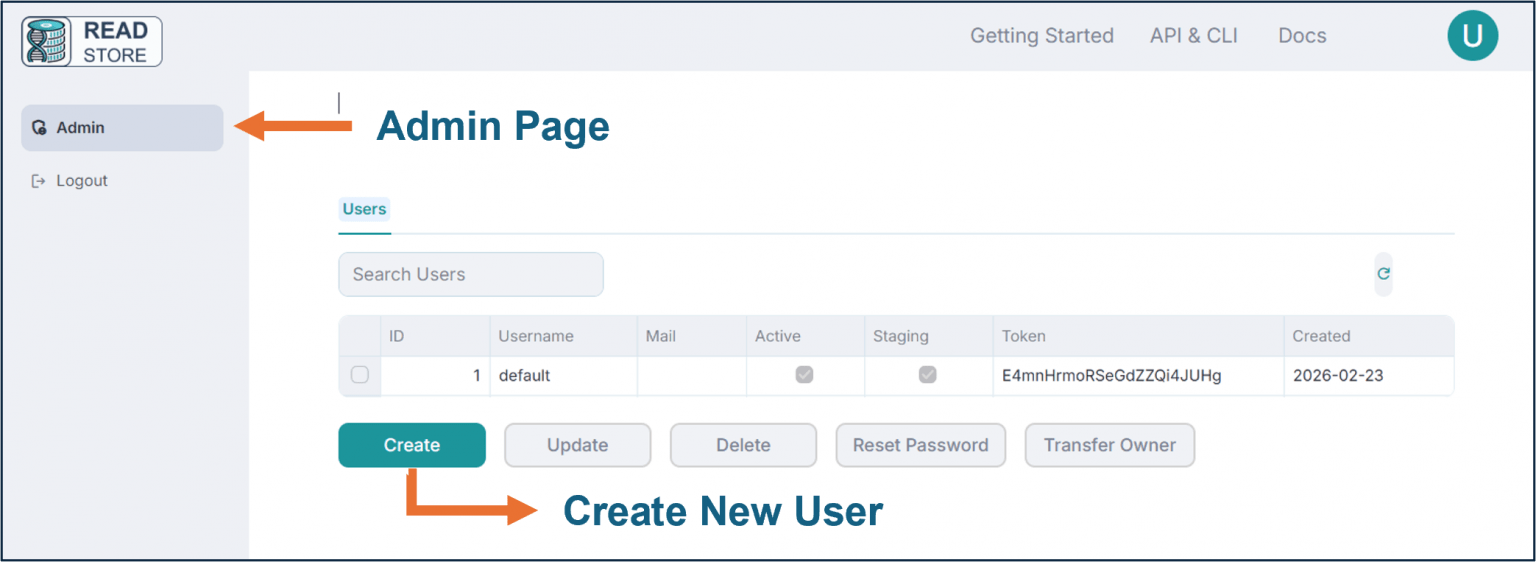
3. Enable Login (Optional) and Create Users
By default, authentication is disabled and the system runs with an automatic user.
To enable authentication:
readstore-server --enable-login --admin-password <your-password>
After enabling login:
- Open the web interface
- Log in as admin
- Create additional users
- Assign permissions as needed
4. Set Up the ReadStore CLI
The CLI allows you to interact with the ReadStore server, especially for uploading data.
Install CLI
pip install readstore-cli
Verify installation
readstore -v
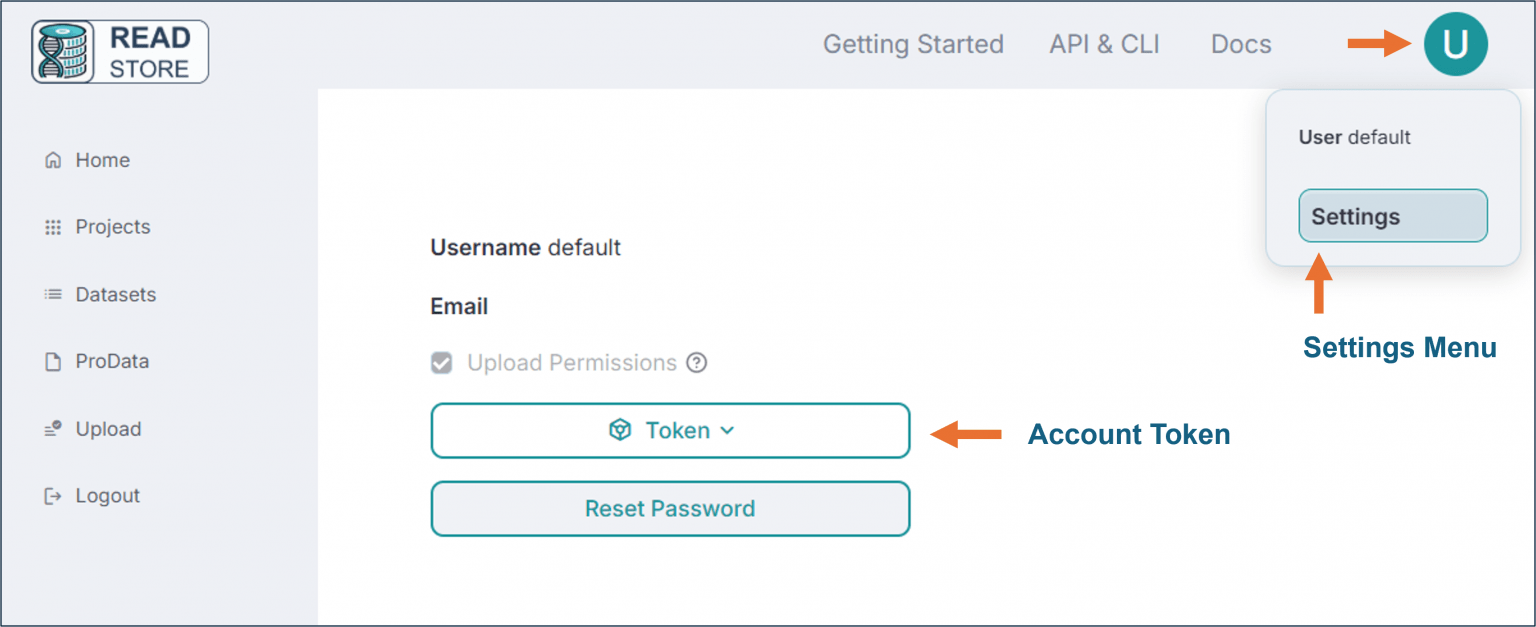
Configure CLI access
readstore configure
You will be prompted to enter:
- Username
- User token
- Output format
The token can be retrieved from the web interface (user settings).
5. Upload FASTQ Files
Once the CLI is configured, upload your sequencing files:
readstore upload *.fastq
Then:
- Open the web application
- Navigate to the Staging page
- Confirm that your files have been uploaded
Congratulations!
You have successfully installed and set up ReadStore Basic.
You can now:
- Upload and manage NGS datasets
- Organize sequencing data efficiently
- Access everything through a browser-based interface
0 answers
No answers yet.
Log in to answer this question.